


In this article
Embark on a transformative journey into hairstyling mastery with our comprehensive guide to 10 indispensable hair dryer attachments. Picture this: you, armed with the knowledge to sculpt your locks into a masterpiece, using tools that elevate your styling game to new heights. Imagine effortlessly defined curls with the magic of the diffuser, or precision styling with the concentrator nozzle.
Tame unruly strands with ease using the comb attachment, or achieve salon-worthy results with the luxe brush attachment. Ready to add volume, sleekness, or waves? We've got you covered. Stay tuned for our exclusive tutorials, unlocking the secrets to flawless styling with each attachment. Your hair's next adventure awaits!
1. Diffuser
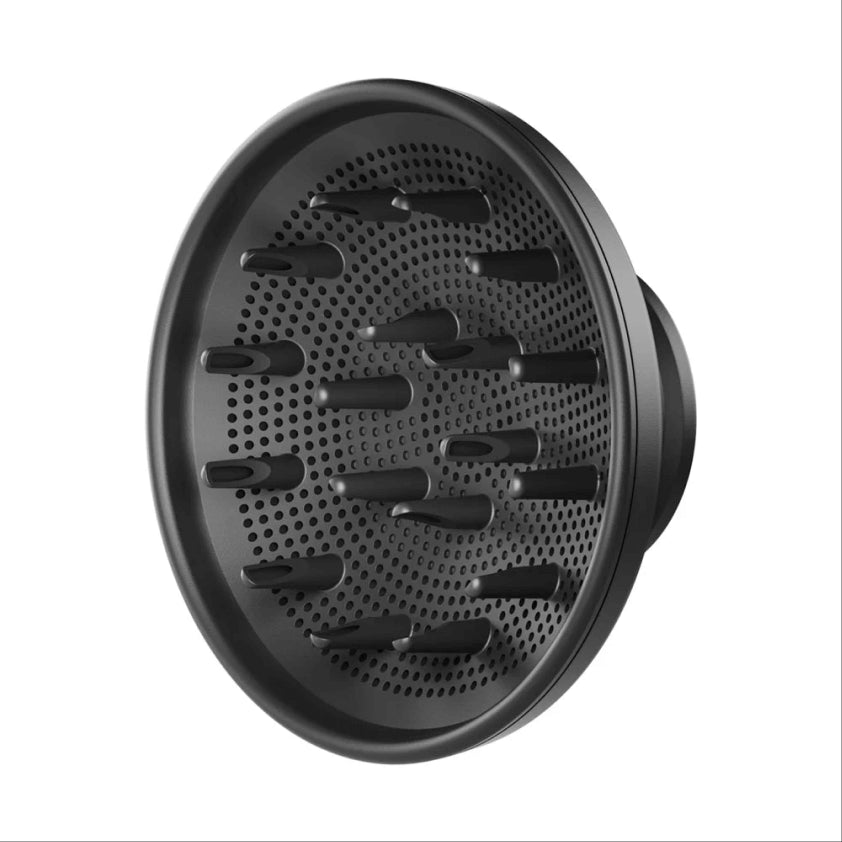
Introducing the hair dryer's unsung hero: the diffuser attachment. Curious? This ingenious tool is designed to enhance natural curls, minimize frizz, and add volume without disrupting your hair's texture.
Perfect for those with curly or wavy hair, the diffuser gently distributes airflow, preserving your locks' natural shape and bounce. Whether you're embracing your curls or seeking to add texture to straight hair, this accessory is your styling ally. Say hello to effortless, tousled waves or perfectly defined ringlets—it's time to let your hair do the talking.
4 easy steps to using a diffuser on a hair dryer
Step 1. Prepare: Start with clean, damp hair. Apply a curl-enhancing product evenly throughout.
Step 2. Attach and section: Secure the hair dryer curl attachment, also known as the diffuser, to the nozzle of your hair dryer. Divide your hair into manageable sections, focusing on one at a time.
Step 3. Curl: Gently place a section of hair into the diffuser, cupping it with your hand. Turn on the hair dryer to low or medium heat and begin drying, moving the diffuser in a circular motion to encourage curls.
Step 4. Repeat and finish: Continue working through each section until your hair is fully dry. For added volume, flip your head upside down and diffuse the roots. Once dry, finish with a blast of cool air to set the curls.
2. Concentrator nozzzle
The concentrator nozzle is a versatile tool for precise styling with a hair dryer, catering to professionals and at-home users alike. It directs airflow to specific areas, making it perfect for achieving sleek, straight styles or defined curls with precision.
Whether you're smoothing out frizz, straightening strands, or creating intricate curls, the concentrator offers controlled airflow for flawless results. Available in various lengths and widths, this attachment provides flexibility to suit different styling needs, ensuring every hairstyle is executed with finesse and accuracy.
3 steps to using hair dryers with a concentrator nozzle
Step 1. Preparation and attachment: Start with clean, towel-dried hair. Apply any styling products you prefer for your desired look. Secure the concentrator nozzle to the end of your hair dryer's nozzle. Ensure it is firmly in place.
Step 2. Sectioning and direction: Divide your hair into manageable sections using clips or hair ties, focusing on one section at a time. Point the concentrator nozzle in the direction you want your hair to go. For straight styles, aim downward; for curls or waves, aim sideways or slightly upwards.
Step 3. Styling: Turn on the hair dryer and adjust the heat and speed settings to your preference. Using a brush or comb, guide your hair through the concentrator nozzle, directing the airflow along the hair shaft for smooth, controlled styling. Repeat this process for each section until your desired look is achieved.
3. Comb attachment
The comb attachment is a must-have tool for hairstyling professionals and enthusiasts alike. It's ideal for detangling and shaping hair while drying, providing versatility and control for various styles. Whether creating sleek, straight looks or adding volume and texture, the comb attachment offers precision and ease.
Use it on damp hair to distribute heat evenly, reducing damage and enhancing shine. Available in different sizes and tooth widths, this attachment caters to different hair types and styling preferences. Incorporate the comb attachment into your routine for effortless detangling, precise parting, and flawless styling results every time.
How to use a blow dryer with a comb attachment
Step 1. Begin with clean, damp hair, and apply your preferred styling products evenly throughout. Secure the comb attachment to the end of your hair dryer's nozzle, ensuring a snug fit.
Step 2. Divide your hair into manageable sections using clips or hair ties, focusing on one section at a time.
Step 3. Turn on the hair dryer and adjust the heat and speed settings to your preference. Use the comb attachment to guide the airflow through your hair, starting from the roots and working your way to the ends. Comb through each section gently, detangling and shaping your hair as desired for a polished, professional finish.
4. Brush attachment
The hair dryer brush attachment, also known as a hair dryer with a comb attached, is a game-changer in the world of hairstyling. Designed for both professionals and home users, this multifunctional tool combines the drying power of a hair dryer with the styling finesse of a comb. It's perfect for achieving sleek, straight styles or adding volume and texture to hair effortlessly.
Use it on damp hair for quick and efficient drying, reducing the need for multiple styling tools. Available in various sizes and shapes, including round brushes for added volume and paddle brushes for smoothing, this attachment caters to different hair types and styling preferences. Say goodbye to tangles, frizz, and unruly hair—embrace the convenience and versatility of the hair dryer brush attachment for flawless styling every time.
The tutorial on using hair dryer with brush attached
Step 1. Begin with clean, towel-dried hair, applying any desired heat protectant or styling products. Secure the hair dryer brush attachment to the end of your hair dryer's nozzle, ensuring it's firmly in place.
Step 2. Divide your hair into manageable sections using clips or hair ties, focusing on one section at a time. Turn on the hair dryer and adjust the heat and speed settings to your preference. Using the hair dryer brush attachment, guide it through each section of hair, starting from the roots and gently pulling downwards for smooth, sleek styles or rolling upwards for added volume and curls.
Step 3. Once each section is dry and styled to your liking, finish with a blast of cool air to set the style and add shine. Repeat the process for each section until your entire head is styled to perfection.
5. Volumizing attachment
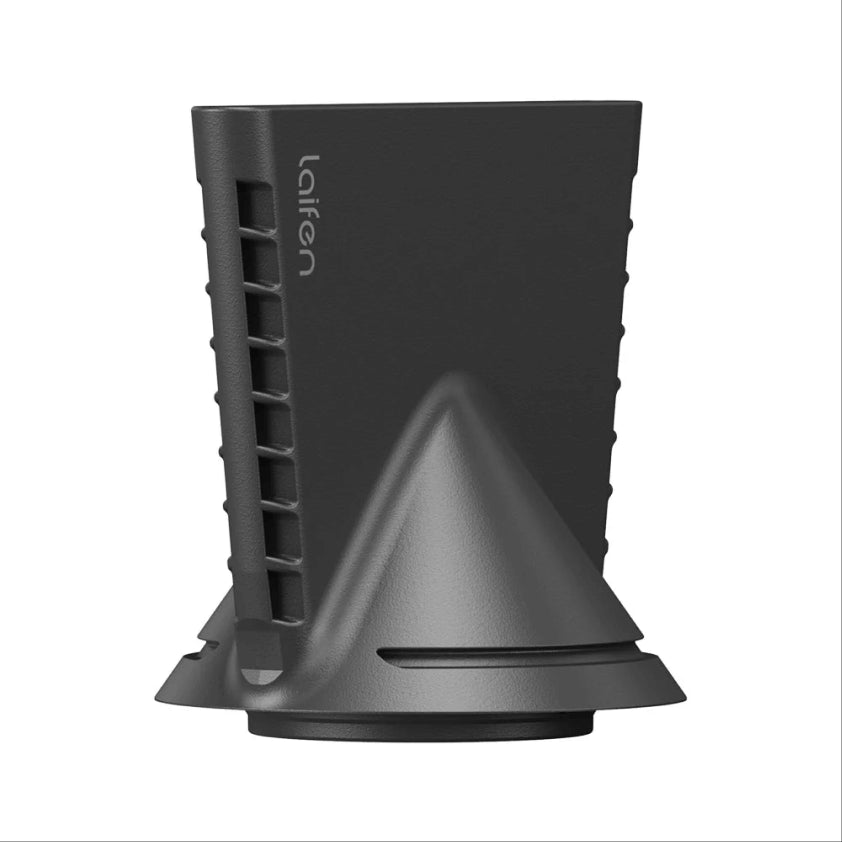
The volumizing attachment, a quintessential tool in hairstyling, delivers unparalleled lift and fullness to hair of all types. Crafted for professionals and enthusiasts alike, it's indispensable for creating dynamic, voluminous styles. Perfect for use on damp hair, it amplifies root volume and adds body effortlessly.
Available in various shapes and sizes, from diffusing disks to vented brushes, it caters to diverse styling needs. To use, simply attach to your hair dryer, focusing airflow at the roots and lifting upwards for maximum volume. Attention to maintaining distance from the scalp and avoiding excessive heat ensures optimal results without compromising hair health.
How to use the volumizing attachment in 3 easy steps
Step 1. Begin with clean, towel-dried hair, applying any desired volumizing products or mousse for added lift. Secure the volumizing attachment to the end of your hair dryer's nozzle, ensuring a secure fit.
Step 2. Divide your hair into manageable sections using clips or hair ties, focusing on areas where you want to add volume, typically at the roots.
Step 3. Turn on the hair dryer and adjust the heat and speed settings to your preference. With the volumizing attachment, focus the airflow at the roots and lift upwards, directing the hair away from the scalp to create lift and volume. Repeat this process for each section until you achieve the desired level of volume and fullness.
6. Straightening nozzle
The straightening nozzle, an essential accessory for hair dryers, is designed to deliver sleek, straight styles effortlessly. Catering to professionals and enthusiasts alike, it's ideal for anyone seeking smooth, frizz-free hair. This attachment is most effective when used on damp hair, allowing for optimal heat distribution and styling control.
Attention to proper technique is crucial to avoid heat damage: maintain consistent movement and keep the nozzle at a safe distance from the hair, typically 1-2 inches away. With various sizes available, from narrow to wide, the straightening nozzle accommodates different hair lengths and textures for flawless results every time.
How to use a straightening nozzle on a hair dryer
Step 1. Start with clean, towel-dried hair, applying a heat protectant product to safeguard against damage. Affix the straightening nozzle securely to the end of your hair dryer's nozzle, ensuring it's properly aligned.
Step 2. Divide your hair into manageable sections using clips or hair ties, focusing on one section at a time. Turn on the hair dryer and select the desired heat and speed settings. With the straightening nozzle, aim the airflow downward and guide a brush or comb through each section of hair, following with the nozzle to smooth and straighten strands.
Step 3. Once each section is straightened to your liking, finish with a blast of cool air to set the style and add shine. Repeat the process for each section until your entire head is sleek and straight.
7. Waving nozzle
The waving attachment, a staple tool for hairstyling enthusiasts, effortlessly creates gentle waves and curls. It caters to individuals of all skill levels, from professionals to beginners, seeking to add texture and dimension to their hair. Available in various sizes and shapes, including diffusing socks and uniquely shaped nozzles, it offers versatility for achieving different wave patterns and styles. Best used on damp hair, it ensures optimal heat distribution and styling control.
Attention to technique is essential: maintain consistent movement and avoid holding the attachment in one spot for too long to prevent heat damage.
2 simple steps to using your waving nozzle on the hair dryer
Step 1. Begin with clean, towel-dried hair, applying a styling product for hold and definition. Secure the waving attachment to the end of your hair dryer's nozzle, ensuring a secure fit.
Step 2. Turn on the hair dryer and adjust the heat and speed settings to your preference. With the waving attachment, gently move the nozzle in a circular motion throughout your hair, focusing on sections where you want to create waves. Continue until your hair is dry and styled to your desired wave pattern.
8. Smoothing nozzle
The smoothing nozzle, a hairstyling essential, works wonders in achieving sleek, frizz-free hair. Designed for individuals of all skill levels, it's perfect for anyone aiming for a polished, professional look. Available in various sizes and shapes, from narrow to wide, it caters to different hair lengths and textures. Best utilized on damp hair, it ensures optimal heat distribution and styling control.
Attention to technique is vital: maintain consistent movement and keep the nozzle at a safe distance from the hair to prevent heat damage. With the smoothing nozzle, say hello to effortlessly smooth, salon-worthy hair every time.
Tutorial: How to use the smoothing nozzle
Step 1. Start with clean, towel-dried hair, applying a smoothing or anti-frizz serum for added control. Secure the smoothing nozzle to the end of your hair dryer's nozzle, ensuring it's properly aligned.
Step 2. Divide your hair into manageable sections using clips or hair ties, focusing on one section at a time.
Step 3. Turn on the hair dryer and adjust the heat and speed settings to your preference. With the smoothing nozzle, direct the airflow downwards, using a brush or comb to guide the hair straight and smooth. Work through each section until your entire head is sleek and frizz-free.
9. Styling concentrator
The styling concentrator, an indispensable tool in hairstyling, offers precision and control for a variety of styles. Suited for professionals and enthusiasts alike, it enables the creation of intricate looks with ease. Available in different shapes and sizes, it caters to diverse styling needs, from shaping bangs to creating flicks. Best utilized on damp or partially dried hair, it ensures optimal heat distribution and styling precision.
Attention to technique is crucial: maintain consistent airflow and adjust the concentrator's angle for desired results. With the styling concentrator, unleash your creativity and elevate your hairstyling game.
Learn how to use a styling concentrator
Step 1. Begin with clean, towel-dried hair, applying any desired styling products for hold or texture. Secure the styling concentrator to the end of your hair dryer's nozzle, ensuring it's firmly in place.
Step 2. Turn on the hair dryer and adjust the heat and speed settings to your preference. With the styling concentrator, focus the airflow precisely on the section of hair you're styling, using a brush or comb to guide the hair as needed.
Step 3. Continue styling each section until you achieve your desired look. For added definition or hold, consider using a styling product once hair is dry.
10. Curling attachment
The curling attachment is a transformative tool for creating beautiful curls and waves. Ideal for individuals of all skill levels, it caters to those seeking to add texture and dimension to their hair effortlessly. Available in various sizes and shapes, including spiral and barrel attachments, it offers versatility for achieving different curl patterns and styles. Best used on damp hair, it ensures optimal heat distribution and styling control.
Attention to technique is essential: maintain consistent movement and avoid holding the attachment in one spot for too long to prevent heat damage. With the curling attachment, embrace endless possibilities for gorgeous, salon-worthy curls.
How to use curling attachments step by step
Step 1. Start with clean, towel-dried hair, applying a heat protectant product to safeguard against damage. Secure the curling attachment to the end of your hair dryer's nozzle, ensuring it's properly aligned.
Step 2. Turn on the hair dryer and adjust the heat and speed settings to your preference. With the curling attachment, gently wrap sections of hair around the barrel, holding for a few seconds before releasing. Continue curling each section until your entire head is styled to perfection.
Outro
You can make bouncy curls with the diffuser or smooth your hair perfectly with the concentrator nozzle. Don't forget the comb attachment for detangling or the brush attachment for a super sleek look!


